Waveform Selection
Data for array analysis can be loaded in different situations:
For a selected event while accessing waveforms using the configured RecordStream interface.
For a chosen time-window while accessing waveforms using the configured RecordStream interface.
From a waveform file accessed through a file browser.
Before loading the data, choose the array. Set the reference time if the requested array elements or data streams are not available during the currently assumed reference time. In LAMBDA the reference time is shown on top of the main window.
Note
Loading data from a particular array is only possible if the SeisComP inventory provides full information on response level for the array within the time window of the requested data.
Event-based data selection
For analyzing a known event, select the event in the Events tab by double-clicking. The epicenter of the event will be shown on the map along with the array elements. The reference time is automatically set to the origin time of the event.
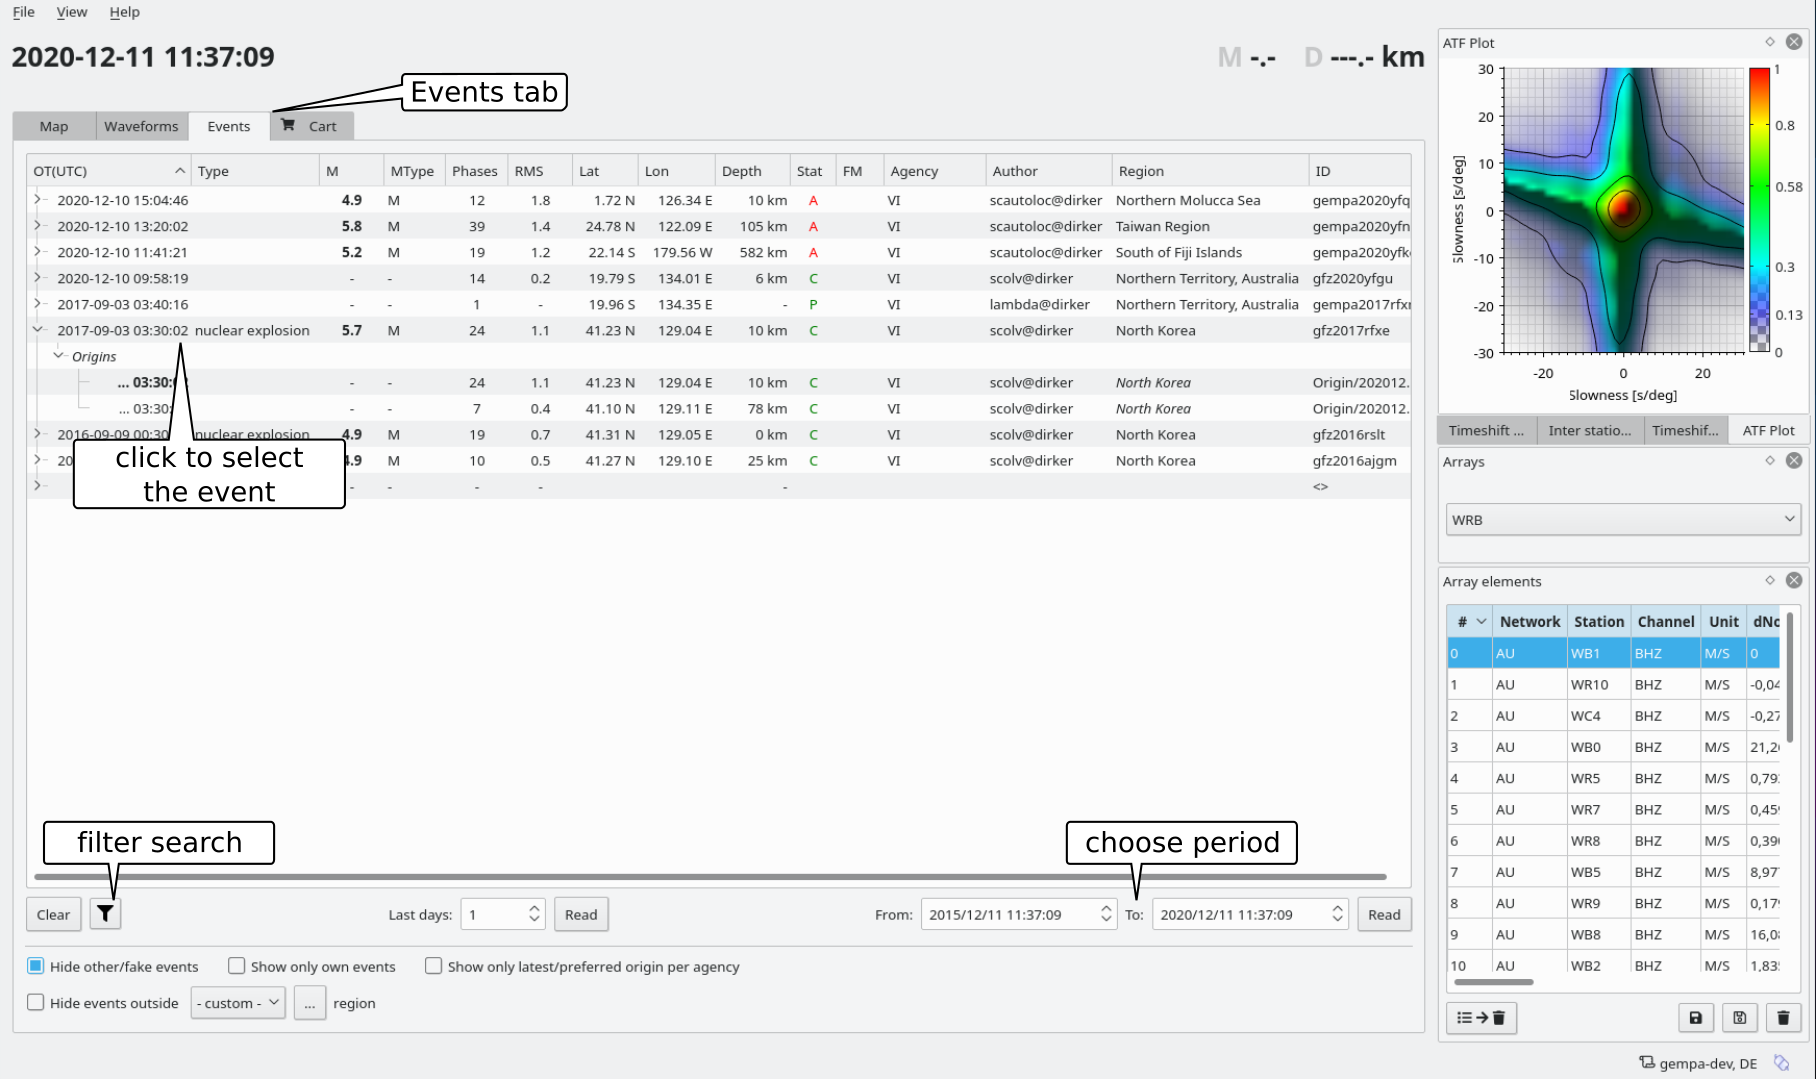
Events tab with an event loaded from the SeisComP database.
The data related to the selected event and the chosen array can be loaded from the configured RecordStream interface or interactively from a file using a file browser. For loading data click on one of the load data buttons in the Waveform tab.
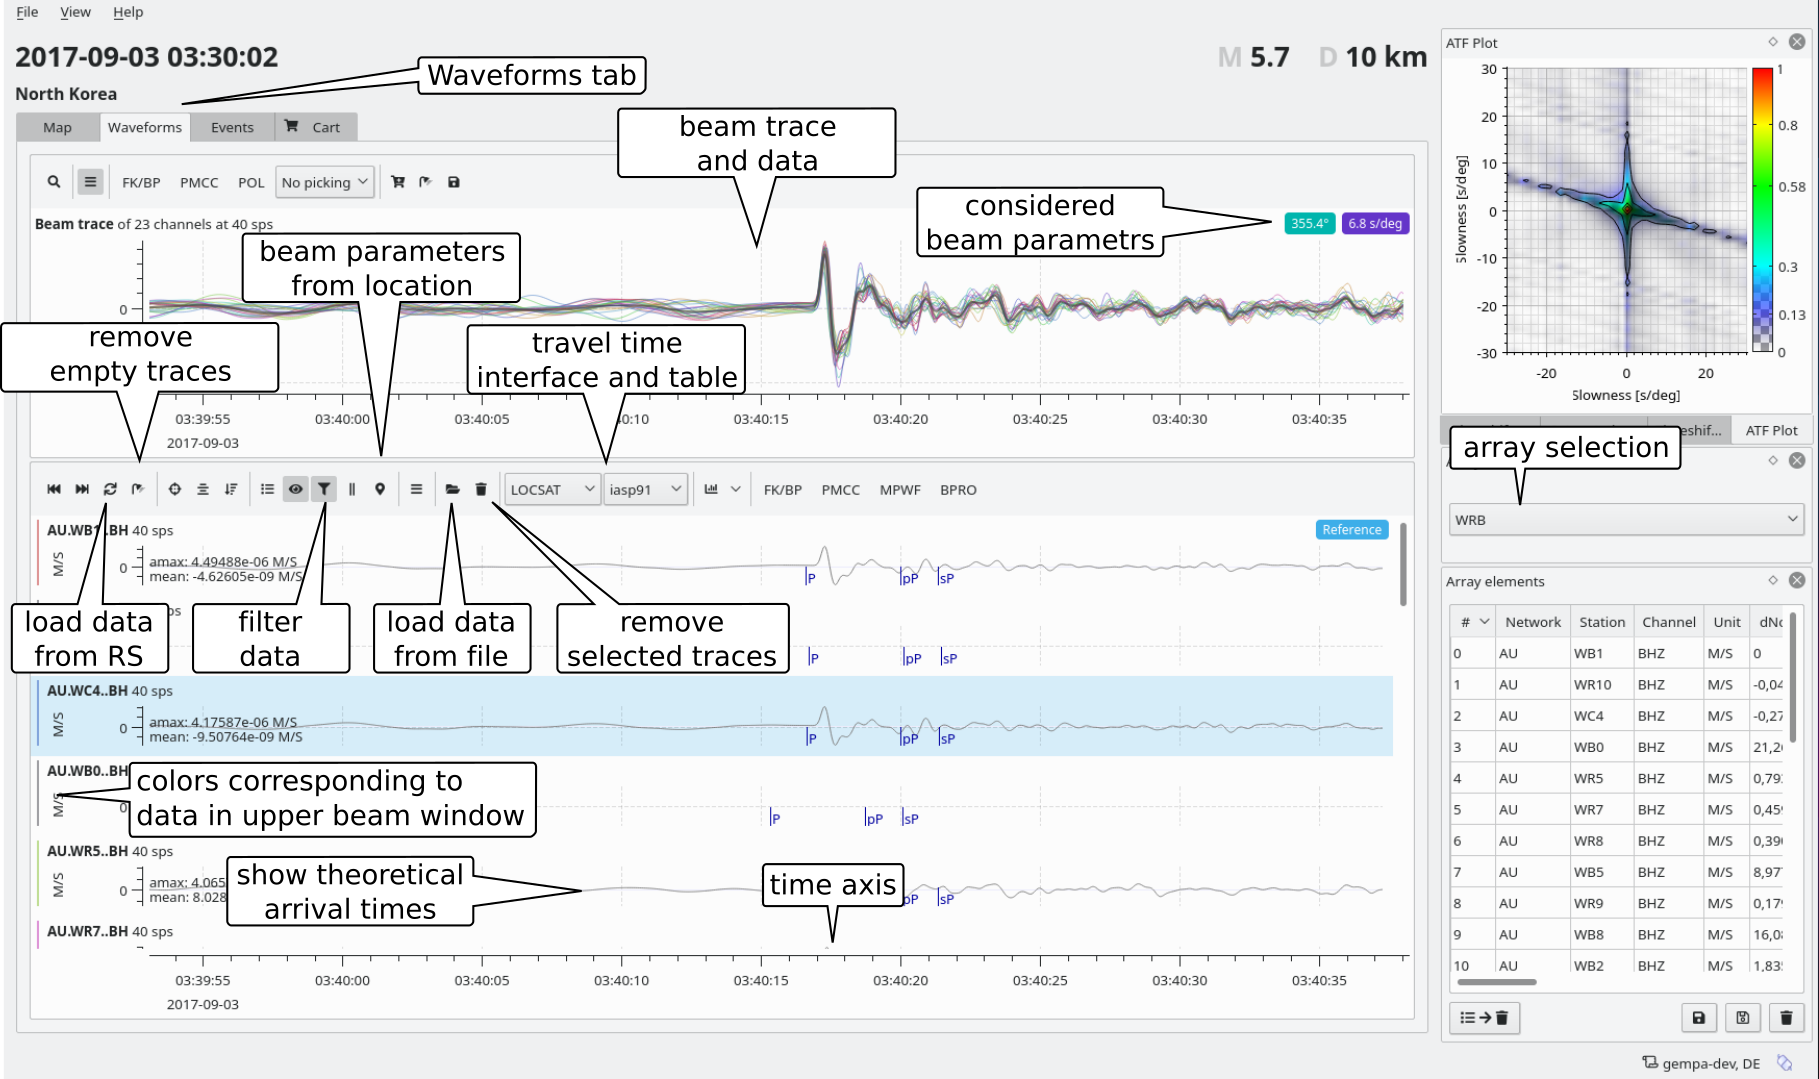
Waveforms tab with data loaded for an event.
When the event is selected the arrival times predicted at the array elements can be shown on the traces. For showing the arrival times, choose the traveltime interface and the traveltime table. Only phases for which a traveltime table exists can be shown.
Time-window-based data selection
Data can be loaded for a given time window. For loading the data adjust the time window on the time axis in the Waveforms tab and click on the button in the Waveforms menu for loading data from RecordStream (RS). For loading data from file choose “Load data” in the File menu (Ctrl+O) or click open the file browser in the waveform widget. LAMBDA will only load data for stations which are elements of the selected array.
When loading the data from file, the reference time is set to the start time of the data. If an event is additionally loaded, the theoretical traveltimes can can be shown on the traces.
Interactive file browsing
Data can be loaded from file independent of any event selection by selecting the miniSEED file through a file browser. Load the data file from the Waveforms tab or choose “Load data” in the File menu (Ctrl+O) or in the Waveform widget. lambda will only load data for stations which are elements of the selected array.
When loading the data, the reference time is set to the start time of the data. If an event is additionally loaded, the theoretical traveltimes can can be shown on the traces.
Waveform Pre-processing
Quality control
For considerations of waveform quality control (QC) read Waveform Quality Control. Stations and their waveforms can be removed interactively in the Waveforms tab of the main window:
Press the “shower” button to remove empty traces.
Select a trace by mouse click and and click on the “trash can” button to remove the selected trace. For multi-selection hold the Ctrl key while selecting traces.
Automatic assisted QC is available in the windows for slowness - wavenumber analysis and backprojection by activating the radio button “Strip bad channels”. The automatic methods to be applied are outlined in Waveform Quality Control.
Fourier spectra
For analyzing the frequency content of individual traces the Fourier spectra can be calculated. For showing the Fourier spectra, select the trace by clicking on the waveforms and hit the Space key. The view of the spectrum is changeable and the spectrum can be downloaded from the opened Spectrum window.
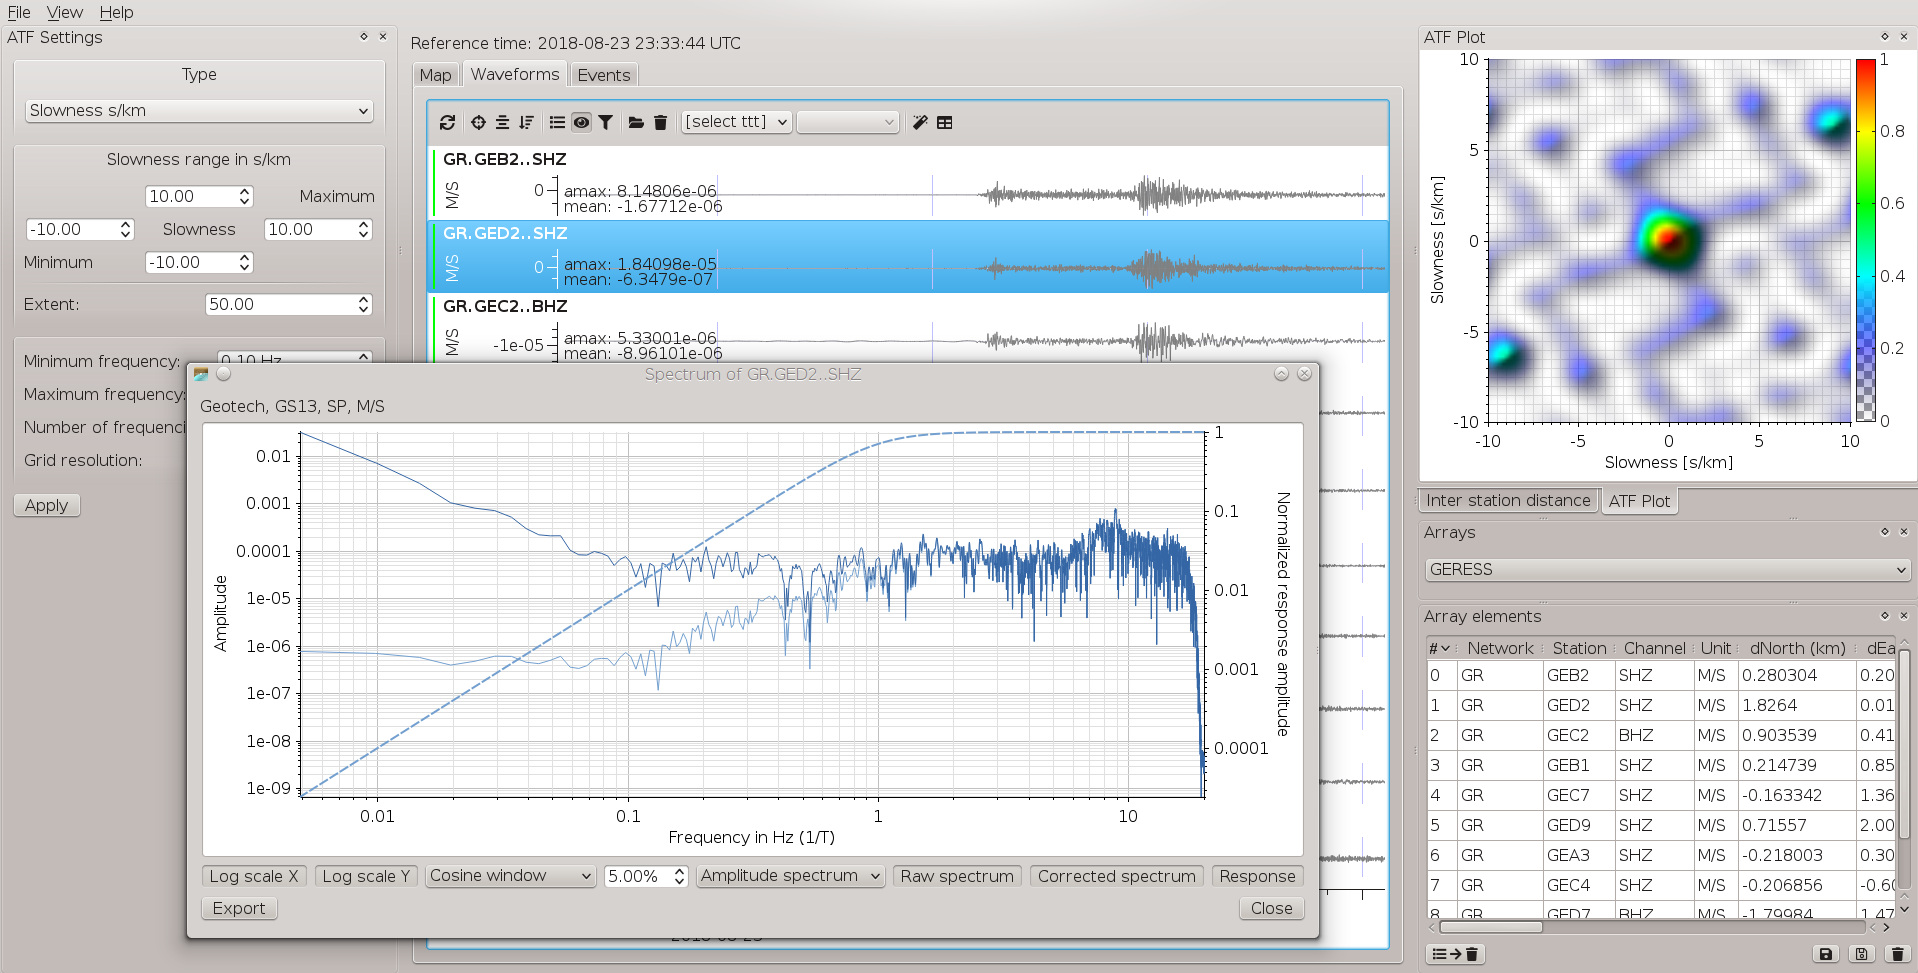
Waveforms tab with data and Fourier spectra.
Spectrograms
Spectrogram are available. Press Ctrl + s to show the spectrogram. To adjust the parameters interactively click on the configure button.
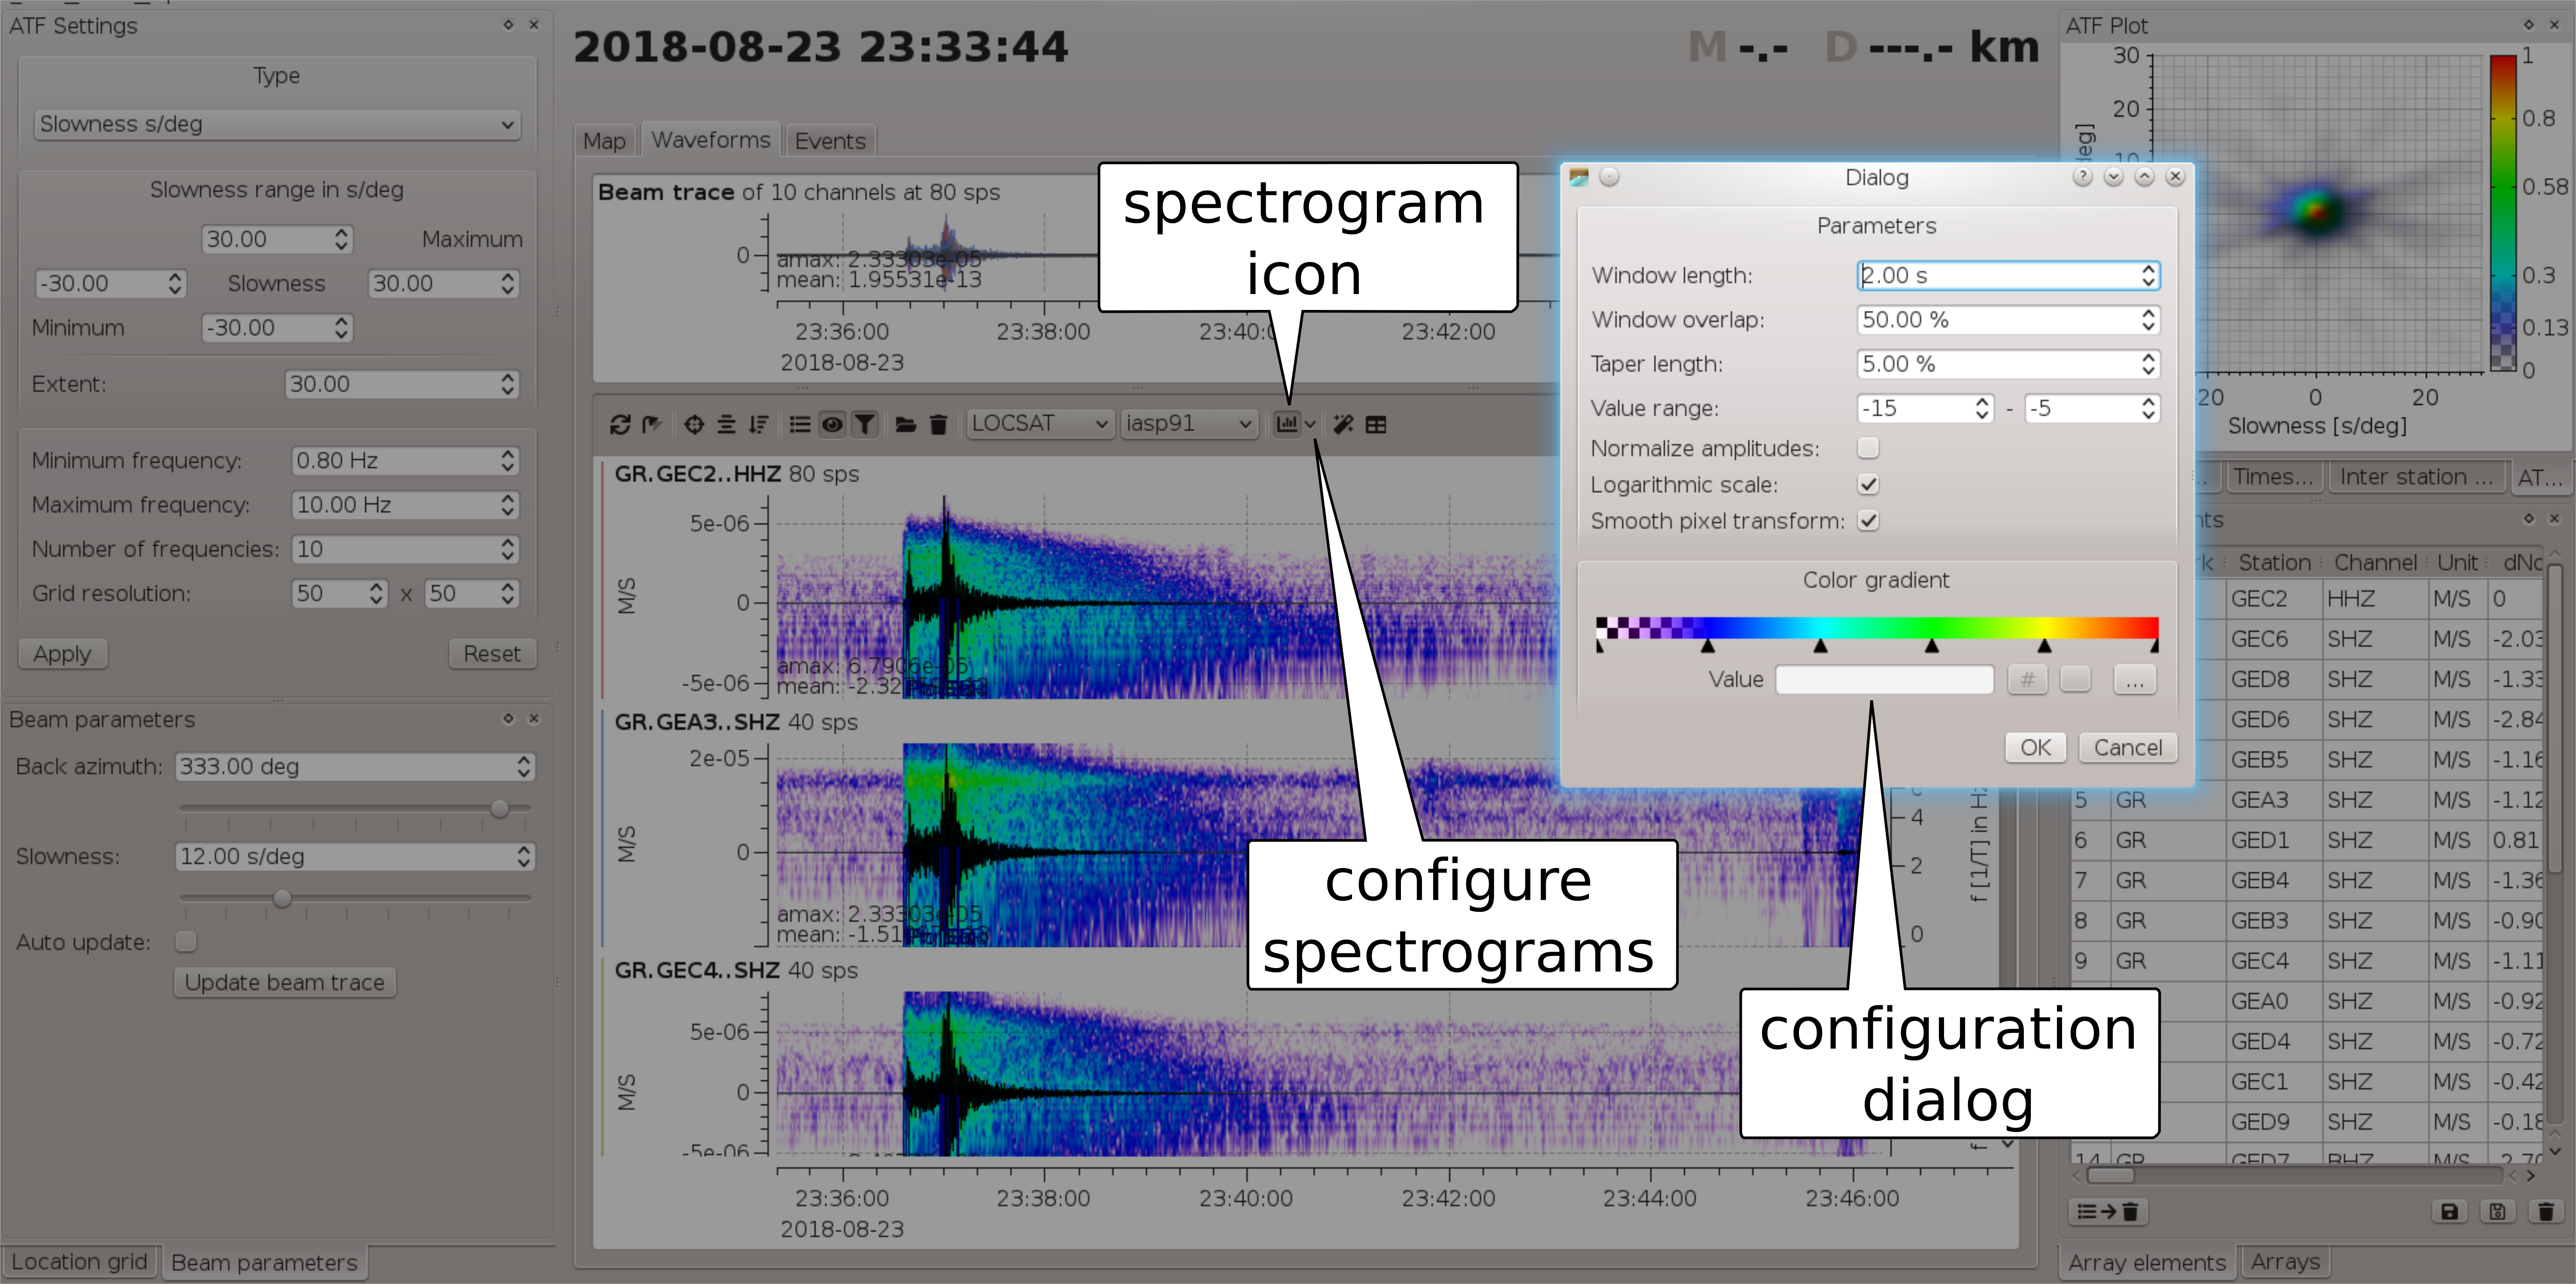
Main waveform view with spectrograms of filtered data.
Data filtering
Data filtering can be controlled in the ATF Settings window:
Choose the filter parameters in the ATF Settings window
Press Apply
Cick on the filter button in one of the Waveforms tab to toggle between viewing of unfiltered or filtered waveforms.
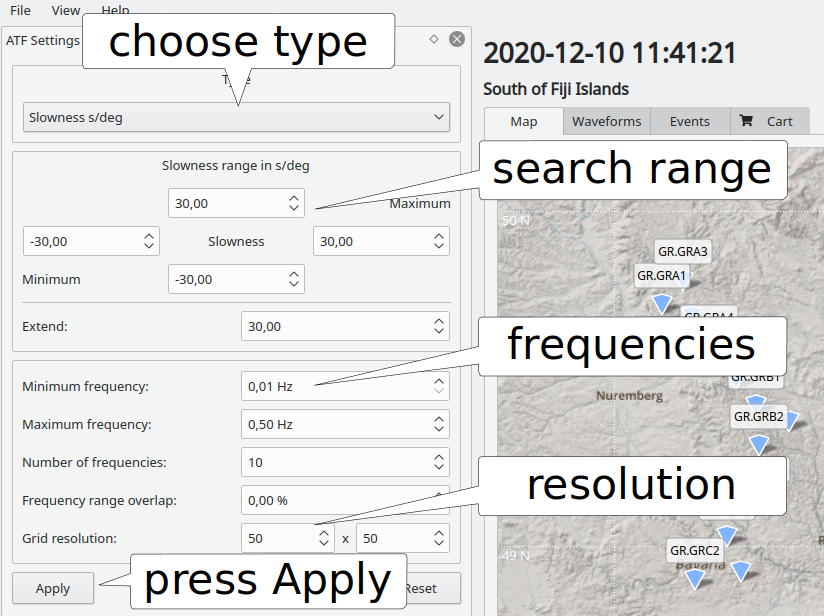
ATF Settings window: Adjust filter settings for data processing.
When loading the data, the waveforms are filtered using the chosen frequency window. The frequency window should be chosen according to the expected frequency signal of the detected signal. The upper corner frequency must be meaningful and not be higher than the Nyquist frequency of any of the loaded data.
Press the Apply button in the Type window in order to apply filtering also to the data before array processing.