
Installation on Ubuntu
You will …
Make a basic SeisComP installation of SeisComP in version 4.0.0 on Ubuntu 20.04
Make an initial configuration
Perform function tests
Pre-requisites for this tutorial:
Internet access
Afterwards/Results/Outcomes:
Run a SeisComP executable
Run a SeisComP GUI program
Time range estimate:
10-15 minutes
Related tutorial(s):
You may install SeisComP by:
Installing pre-compiled release packages including binaries, maps and documentation.
Get your Linux System ready
First you need to get your Linux system ready. The following documentation refers to Ubuntu 20.04, but the steps for other Ubuntu versions are similar.
Add a new user. Throughout our documentation, this user is called sysop.
$ sudo adduser sysop
$ sudo addgroup admin
$ sudo usermod -a -G admin,adm,audio sysop
Note
Adding a new user is not mandatory. You can install under an existing user directory. Creating a new user is recommended as it allows an easy cleanup of the system later simply by removing the new user if needed.
Check the size and the architecture. This is espcially required when installing pre-compiled packages:
$ df -h
$ cat /etc/issue
$ uname -m
Compare the available disk space with the requirements given in the SeisComP Installation section. If ‘uname’ shows ‘i686’, you have a 32-bit system; if you see ‘x86_64’, you have 64-bit.
Install from source code
To compile SeisComP from the source code follow the instructions in the development section. You may later download and add maps as described below in the Documentation of installation.
Install pre-compiled release packages
You may install the SeisComP packages in either way:
Here we refer to the manual extraction of packages. More details are given in section SeisComP Installation.
You may download and installed pre-compile SeisComP binary package, maps and documentation.
Download the appropriate SeisComP binary package taking into account your Linux distribution and the architecture. Get the package from the download site of SeisComP [77] or from Public download site of gempa [21]. Packages are available for Ubuntu and other Linux flavors such as RHEL/CentOS and Debian.
When downloading the SeisComP binary packages you should also download
maps for SeisComP
$ wget "https://www.seiscomp.de/downloader/seiscomp-maps.tar.gz"
the documentation package. Make sure, the documentation matches your SeisComP version.
Note
The SeisComP packages received from Public download site of gempa [21] contain the documentation for the respective version and no separate download is required.
Untar the
seiscomp*files (binary package, maps and documentation) you will find in your home or downloads directory. For SeisComP in version 4.0.0 this is:$ cd $ tar xzf seiscomp-4.0.0-ubuntu20.04-x86_64.tar.gz $ tar xzf seiscomp-maps.tar.gz $ tar xzf seiscomp-4.0.0-doc.tar.gz $ ls seiscomp bin etc include lib man sbin share
Install all dependencies needed and prepare the environment.
This should be automatic for most distributions. Simply run the install script
$ ~/seiscomp/bin/seiscomp install-deps base
Distribution: Ubuntu 20.04
This will generally prompt for your user’s password to allow sudo to install packages on your system.
On Ubuntu 18, Python 3 is installed, but not Python. Get it first
$ sudo apt-get install python libqtgui4
On Ubuntu 20 and newer, you may need libpython3-dev before you can use “install-deps”
$ sudo apt-get install libpython3-dev
Alternatively, for Mint 18 (Ubuntu 16.04):
$ sudo apt-get update
$ sudo apt-get install libxml2 libboost-filesystem1.58.0
libboost-iostreams1.58.0 libboost-thread1.58.0 libboost-program-options1.58.0
libboost-regex1.58.0 libboost-signals1.58.0 libboost-system1.58.0 libssl1.0.0
libncurses5 libmysqlclient20 libpq5 libpython2.7 python-numpy mysql-server
mysql-client libqtgui4 libqt4-xml libqt4-opengl libqt4-sql-sqlite
Database. For a MariaDB installation:
$ seiscomp install-deps mariadb-server
or a MySQL installation:
$ seiscomp install-deps mysql-server
Also, for better performance with a MariaDB/MySQL database, adjust the memory pool size and the restart MariaDB/MySQL server, as described in the Database Server Configuration section.
For PostgreSQL, also see the detailed SeisComP Installation instructions.
Warning
For Ubuntu 18.04 and newer, take care with MariaDB/MySQL installation. Before the next step, you must set a root password for MariaDB/MySQL (not the Linux root password!).
MariaDB:
$ sudo mysql -e "SET old_passwords=0; ALTER USER root@localhost IDENTIFIED BY 'MyNewPassword'; FLUSH PRIVILEGES;"
MySQL:
$ sudo mysql -e "ALTER USER root@localhost IDENTIFIED WITH mysql_native_password BY 'MyNewPassword'; FLUSH PRIVILEGES;"
Substitute MyNewPassword by your own password and remember it – you will need it in the next step. In case of problems, search the Internet, or the SeisComP forum thread (for logged-in forum members).
Configuration
Find a detailed description in section Getting Started with SeisComP and short guide below.
You may set some system environment variables. For bash users, print the environment variables and copy them to your
.bashrc$ ~/seiscomp/bin/seiscomp print env export SEISCOMP_ROOT=/home/sysop/seiscomp export PATH=/home/sysop/seiscomp/bin:$PATH export LD_LIBRARY_PATH=/home/sysop/seiscomp/lib:$LD_LIBRARY_PATH export PYTHONPATH=/home/sysop/seiscomp/lib/python:$PYTHONPATH export MANPATH=/home/sysop/seiscomp/share/man:$MANPATH export LC_ALL=C source /home/sysop/seiscomp/share/shell-completion/seiscomp.bash
The path to your home directory will likely differ from /home/sysop as shown above. Therefore, do not copy and paste what you see here but use for your own system the output from the command
~/seiscomp/bin/seiscomp print env
Add the output from the command to your file
~/.bashrc$ vi ~/.bashrc
Then reload the content of
~/.bashrcin your current environment$ source ~/.bashrc
After this, you won’t have to type ~/seiscomp/bin/seiscomp as the seiscomp command will be added to your shell’s path.
Hint
If, when you attempt to run a SeisComP command such as scconfig or scolv, you receive an error message like
scconfig: command not found
then the most likely explanation is that you have not set your SeisComP environment variables correctly.
Run the seiscomp command with the full path to where you installed. The seven lines of output are not actually run by the ‘seiscomp print env’ command; you need to cut and paste them into your shell to run them. You can also add these to your
~/.bashrc,~/.profile, or equivalent file with commands to be run every time you log in.Run seiscomp setup and enter your preferred IDs and password. For the other fields, you can always accept the default values.
$ seiscomp setup
You should enter an appropriate short name (without spaces) for Agency ID and Datacenter ID. These are used for Arclink and Seedlink, and in the information describing data model objects such as origins and events.
The seiscomp command is a wrapper, which controls the SeisComP modules. See System management. Run something by typing seiscomp followed by a command
 $ seiscomp help
 Available commands:
  install-deps
  setup
  shell
  enable
  disable
  print
  help

Use 'help [command]' to get more help about a command
Start and test scmaster. As described in the Overview, these are needed for communication between the SeisComP database and the individual SeisComP modules.
$ seiscomp start scmaster
starting scmaster
$ seiscomp status scmaster
In case errors are reported you should understand the full debug log:
$ scmaster --debug
Install all dependencies needed for the GUI
$ seiscomp install-deps gui
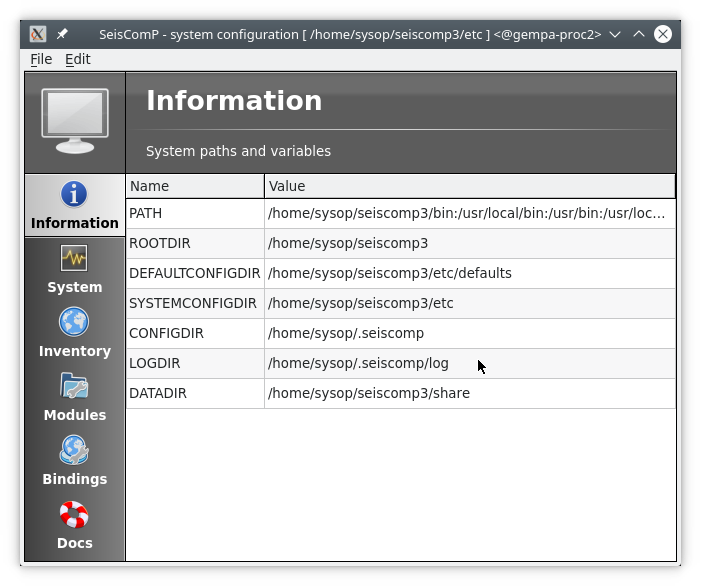
Start the scconfig GUI
$ seiscomp exec scconfig
Learn more about scconfig in this documentation. You should see a screen/window like this.
Run scrttv
$ seiscomp exec scrttv
After seeing the SeisComP splash screen, you’ll likely get an error message “Could not read inventory (NULL)”. After a new installation, that’s okay. Click that box away, and you’ll see a screen with “Enabled”, and “Disabled” tabs, and time along bottom axis as in the figure below. To see stations and data you will later need to add inventory and waveforms to your system.
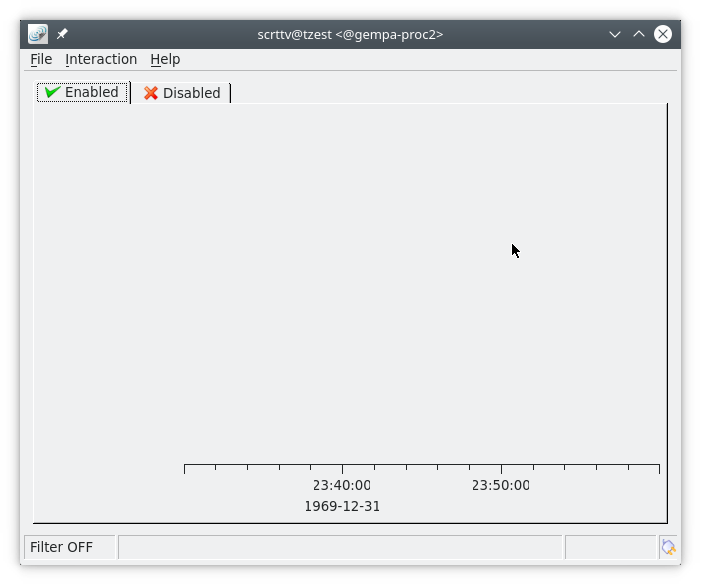
First view of the scrttv. The list of streams is still empty due to the missing of configuration.
Congratulations, you’re done with this tutorial.

